20: HTML forms—the basics
11th October 2012: Material moved to webplatform.org
The Opera web standards curriculum has now been moved to the docs section of the W3C webplatform.org site. Go there to find updated versions of these docs, and much more besides!
12th April 2012: This article is obsolete
The web standards curriculum has been donated to the W3C web education community group, to become part of a much bigger educational resource. It is constantly being updated so that it remains current with modern web design practices and technologies. To find the most up-to-date web standards curriculum, visit the web education community group Wiki. Please make changes to this Wiki yourself, or suggest changes to Chris Mills, who is also the chair of the web education community group.
Introduction
Everyone has seen a form. Everyone has used one. But have you coded one?
A form online is any area where you can input information into a web page, for example entering text or numbers into a text box, checking a tick box, causing a radio button to “fill in”, or selecting an option from a list. The form is then submitted to the web site when you push the submit button.
You’ll see forms used on the Web everywhere, for entering user names and passwords on login screens, commenting on blogs, filling your profile in on a social networking site, or specifying billing information on a shopping site.
It is easy to create a form, but what about a web standards compliant form? By now, if you have been working through the Opera Web Standards Curriculum, you are hopefully convinced that web standards are the way to proceed forward. The code required to create a standards compliant accessible form are no more work to implement than a sloppy form.
So, let’s start with the most basic and simple form that one could possibly want to use and build our way up in complexity after that—in this article I’ll cover all the basics you need to know to create elegant, accessible form structures with HTML. The article structure is as follows:
- Step one: The basic code
- Step two: Adding structure and behaviour
- Step three: Adding semantics, style and a bit more structure
- Summary
- Further reading
- Exercise questions
Step one: The basic code
Let’s start off with a really basic comment form, the sort of form you would use on a web site to allow people to give you feedback on something such as an article you’ve written, or allow someone to contact you without knowing your e-mail address. The code looks like this:
<form>
Name: <input type="text" name="name" id="name" value="" />
Email: <input type="text" name="email" id="email" value="" />
Comments: <textarea name="comments" id="comments" cols="25" rows="3"></textarea>
<input type="submit" value="submit" />
</form>
If you enter this into an HTML document and then open that document in a browser, the code is rendered as shown in Figure 1.

Figure 1: The first, basic form example.
Try it for yourself—enter the above code into your own sample HTML document and load it in a browser, or click here to navigate to the form in a separate page. Try playing around with the different form controls to see what you can do with them.
As you read the code, you’ll see an opening <form> tag, a </form> closing tag, and some bits in between the two. The element contains two text inputs in which the page’s reader can enter their name and email address, and a textarea that can be filled with a comment to submit to the site owner.
What have we got here?
<form></form>: These two tags are essential to start and end a form—without them you don’t have a web form. Every form must start and end with<form>and</form>tags.The
<form>tag can have a few attributes, which will be explained in Step Two, but please do note that you can’t nest forms inside each other.<input>(should be<input />if you’re using an XHTML doc type): This tag defines the area where you can insert information. In our case above,inputtags define text boxes where site visitors can type in their name and email.Every input tag must have a
typeattribute to define what it will receive: the possible attribute values aretext,button,checkbox,file,hidden,image,password,radio,resetorsubmit.Every
<input>tag must also have a name (except in special cases where thevalueattribute is always set to the same value as thetypeattribute, egtype="submit"or"reset"), which you the coder can decide on. Thenameattribute informs the thing the data is sent to when the form is submitted (be it a database, or an email sent to the site’s administrator via a server-side script) what the name of the information in the input box is. When the form is submitted, most scripts use thenameattribute to place the form data into a database or into an email that can be read by a person.Thus, if the
<input>element is for the site visitor to enter their name into, then thenameattribute would bename="name"orname = "first name", etc. If the<input>tag is for an email address, then thenameattribute would bename="email". To make it easier on yourself, and the person who will use the form, it is recommended that you name the<input>element in a semantic fashion.By semantically, I mean naming it according to what its function is, as detailed above. If the input is to receive an email address, then name it
name="email". If it is to be the street address of the site visitor, then name itname="street-address". The more accurate the word usage the easier it is not only for you to code the form and then perform maintenance tasks on later, but also for the person or database receiving the form to understand it. Think lean and mean with accurate meaning.Every
<input>tag should also have avalueattribute. The value can be set to blank—value=""—which will tell the processing script to just insert whatever the site visitor types into the box. In the case of a checkbox, radio button, hidden, submit, or other type attributes you can set the value to equal what you want the default to be. In other cases, such as submit or hidden, you set the value to equal the final input. Examples:value="yes"for yes,value="submit"for a submit button,value="reset"for a reset button,value="http://www.opera.com"for a hidden redirect, etc.Examples of how to use the
valueattribute:A blank value attribute, which the user input determines the value of:
The code says:
<input type="text" name="first-name" id="first-name" value="" />The user inputs: Jenifer
The value of
first-nameis sent as “Jenifer” when the form is submitted.
A predetermined value:
The code says:
<input type="checkbox" name="mailing-list" id="mailing-list" value="no" />The user checks the box as they wish to join the website’s mailing list.
The value of
mailing-listis sent as “yes” when the form is submitted.
After the two
<input>elements, you can see something a bit different—thetextareaelement.The folks at
textareabring you a nice, new, improved space to input text into. Not your ordinary, plain old one line text box that our friend<input>provides, thetextareaelement provides multiple lines of input, and you can even define how many lines are available to enter text into. Note thecolsandrowsattributes—these are required for everytextareaelement, and specify how many columns and rows big to make the text area. The values are measured in characters.Last but not least, you have a special
<input>element with the attributevalue="submit". Instead of rendering a one line text box for input, the submit input will render a submit button that, when clicked, submits the form to whichever target the form has specified to send its data to (currently this isn’t defined at all, so submitting the form will do nothing.)
Step two: Adding structure and behaviour
So, you clicked on the form #1 link above, filled it out and clicked Submit—why didn’t it do anything, and why does it look so bad and all in one line? The answer is that you haven’t structured it yet, or defined a place for the data the form is collecting to be submitted to.
Let’s go back to the drawing board, with a new form:
<form id="contact-form" action="script.php" method="post">
    <input type="hidden" name="redirect" value="http://www.opera.com" />
    <ul>
        <li>
            <label for="name">Name:</label>
            <input type="text" name="name" id="name" value="" />
        </li>
        <li>
            <label for="email">Email:</label>
            <input type="text" name="email" id="email" value="" />
        </li>
        <li>
            <label for="comments">Comments:</label>
            <textarea name="comments" id="comments" cols="25" rows="3"></textarea>
        </li>
        <li>
            <input type="submit" value="submit" />
            <input type="reset" value="reset" />
        </li>
    </ul>
</form>
This form looks like Figure 2 when rendered in a browser:
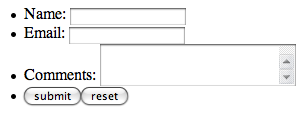
Figure 2: The second form example—looking better, but still not perfect.
You can play with the improved form on a separate page by clicking here.
Here I have made a few additions to the basic, simple form. Let’s break it down so you know what I did:
There are some new attributes inside the
<form>tag. I added anidattribute to not only semantically name what this form is called, but also to provide a unique ID to identify the form so it can be more easily styled using CSS or manipulated using JavaScript if required. You can only have one of eachidper page; in this case I called itcontact-form.Lights, camera, action! When you pressed the submit button in the first form and it did not do anything, this was because it had no action or method. The
methodattribute specifies how the data is sent to the script that will process it. The two most common methods are “GET” & “POST”. The “GET” method will send the data in the page’s URL (you will sometimes see URLs along the lines ofhttp://www.example.com/page.php?data1=value1&data2=value2...; these are bits of data being transported using the “GET” method). Unless you have a specific reason to use “GET”, it is probably best to not use it if you are trying to send secure information as anyone can see the information as it is transmitted via the URL. “POST” sends the data via the script that powers the form, either to an email that is sent to the site’s administrator, or a database to be stored and accessed later, rather than in the “GET” URL. "POST" is the more secure and usually the better option.If you are very concerned about the security of the data in the form, for example if you are submitting a credit card number to a shopping site, then you should use the https protocol with a secure socket layer (SSL). Basically, this means that data will be sent over the https protocol, not the http protocol. Have a look at the URLs next time you are paying for something on a shopping site, or using online banking—you’ll probably see https:// in your address bar, not http://. The difference is that an https connection is a bit slower to transmit than http, but the data is encrypted, so anyone hacking into the data connection can’t make any sense out of it while it is in transit. Talk to your web host for information on how they can provide you with https and SSL.
The
actionattribute specifies what script file the form data should be sent to for processing. Many web hosts will have a generic send mail script or other form scripts available for use (see your host’s documentation for information) that they have customized to their servers. On the other hand, you could use a server-side script that you or someone else has created to power your form. Most of the time, folks use languages such as PHP, Perl or Ruby to create a script that will process the form—you could for example send an email containing the form information, or input the form information into a database to be stored for later use.It is outside of the scope of this course to write up a server-side script for you, or teach you how to write server-side code yourself—please inquire with your host to find out what they offer, or find a nice programmer to befriend.
Here are a few resources to get you started if you would like to investigate server-side scripting:
Perl: http://www.perl.com/
PHP: http://www.php.net
PHP documentation on Forms: http://uk3.php.net/manual/en/tutorial.forms.php
Python: http://python.org/
Ruby: http://www.ruby-lang.org
Sendmail: http://www.sendmail.org/
ASP.NET: http://www.asp.net/
The second line that’s been added to our Step Two form is the “hidden” input field—this is a redirect. What?
Under the goal of separating markup structure from presentation and behaviour, it is ideal to use the script that will power the form to also redirect the user once the form is submitted. You don’t want your users to be left sitting there looking at the form page, wondering what the heck to do next after they’ve submitted the form; I’m sure you’ll agree that it is a much better user experience to instead redirect your users to a thank you page featuring “what to do next” links, after a successful form submission. This line in particular specifies that after this form is submitted, the user will be redirected to the Opera homepage.
To improve the look of the form, I have put all the form elements into an unordered list so that I can use the markup to line them up cleanly and then use CSS to polish the look.
Some folk would argue that you should not use an unordered list to markup a form, but use a definition list instead. Others would argue that one should not use a list at all but use CSS to style the
<label>and<input>tags. I will let you research this debate and make up your own mind on which is more semantically correct. For our simple exercise I will use the unordered list.Last but not least in step two, I’ve labeled the form elements. Both in terms of meaning and making the form accessible to a wide range of internet enabled devices, it is best to give all the form elements labels—check out the contents of the
labelelements - these labels are tied to their respective form elements by giving theinputandtextareaelementsids that have the same value as the labels'forattributes. This is great because it not only gives a visual indicator of the purpose of each form field on the screen, but it also gives the form fields more meaning semantically. For example, a visually impaired person using the page with a screenreader can now see which label goes with which form element. Theids can also be used to style individual form fields using CSS.By now you are probably wondering why
idattributes are included as identifiers in form elements as well asnameattributes. The answer is thatinputelements withoutnameattributes are not submitted to the server, so those are definitely needed.idattributes are needed to associate form elements with their correspondinglabelelements. You should therefore use both.
The 2nd form displays a bit better, but it has been beaten with the default ugly stick. Time to add a few more bits and bobs before applying some style.
Step three: Adding semantics, style and a bit more structure
Now I’ll finish off what I started at the beginning of the article, with the following final version of my example form:
<form id="contact-form" action="script.php" method="post">
  <fieldset>
    <legend>Contact Us:</legend>
    <ul>
      <li>
        <label for="name">Name:</label>
        <input type="text" name="name" id="name" value="" />
      </li>
      <li>
        <label for="email">Email:</label>
        <input type="text" name="email" id="email" value="" />
      </li>
      <li>
        <label for="comments">Comments:</label>
        <textarea name="comments" id="comments" cols="25" rows="3"></textarea>
      </li>
      <li>
        <label for="mailing-list">Would you like to sign up for our mailing list?</label>
        <input type="checkbox" checked="checked" id="mailing-list" value="Yes, sign me up!" />
      </li>
      <li>
        <input type="submit" value="submit" />
        <input type="reset" value="reset" />
      </li>
    </ul>
  </fieldset>
</form>
When rendered in a browser, this form looks as shown in Figure 3.
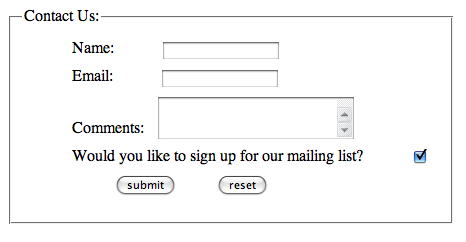
Figure 3: The final form example in all its glory.
To see this form live in a browser and play with it, following this link to the form on a separate page.
The last two major elements I have added to this form are fieldset and legend. Both of these elements are not mandatory, but are very useful for more complex forms and for presentation.
The fieldset element allows you to organize the form into semantic modules. In a more complex form, you could for example use different fieldsets to contain address information, billing information, customer preference information, and so on. The legend element allows you to name each fieldset section.
I’ve also applied a little bit of CSS to this form, to style the structural markup. This is applied to the third form example using an external stylesheet—click on this link to see the styles. The two most important tasks I wanted the basic CSS to do is add margins to line up the labels and input boxes, and get rid of the unordered list’s bullet points. Here is the CSS that resides in the external stylesheet:
#contact-form fieldset {width:40%;}
#contact-form li {margin:10px; list-style: none;}
#contact-form input  {margin-left:45px; text-align: left;}
#contact-form textarea {margin-left:10px; text-align: left;}
What does it do? The first line styles the fieldset border to not take up the whole page; you could also set the border to none using {border: none;} if you didn’t want one. The second line puts a margin of 10 pixels on the li elements to help give a little visual room between each list item. The third and fourth lines set a left margin on the input and textarea elements so that they don’t crowd the labels and line up properly.
If you would like more information on the styling of a form please consult the article on Styling Forms in this Web Standards Curriculum (to be published at a later date) or Nick Rigby’s A List Apart article on “Prettier Accessible Forms”. You will also be able to find more information on margins and borders later on in this course.
Summary
In this article, I have covered the most basic three steps to a web standards compliant form. There is much more in form world I did not cover here and that is left for you to explore for now. There are access keys, checkboxes and radio buttons, custom submit and reset buttons, and select boxes.
In the above Step three Form, I added a checkbox to show how you can use the additional attributes in the input element to collect information that is beyond the single line text input or the multiple line text area input. The checkbox and radio button attribute values could be used to add the ability to ask short questions and give the reader a list of options to choose from (checkboxes allow you to select multiple options, radio buttons only one). Radio buttons can be very useful in a survey form.
The select element, also not featured in this article, can be used for a drop down menu of choices (for example a list of countries, or states/provinces).
Further reading
- Cameron Adams, “Accessible, stylish form layout”: http://www.themaninblue.com/writing/perspective/2004/03/24/.
- Brian Crescimanno, “Sensible Forms: A Form Usability Checklist”: http://www.alistapart.com/articles/sensibleforms/.
- Simon Willison, “Easier form validation with PHP”, http://simonwillison.net/2003/Jun/17/theHolyGrail/.
- The Spec. Not any old specification, but THE W3C SPEC—http://www.w3.org/TR/html401/interact/forms.html. If you ever have a bout of insomnia in which a warm glass of milk, counting sheep, and Ambien are not putting you to sleep, go read the whole spec for HTML 4.01 or XHTML 1.0 at the w3.org. It is cheaper and more effective than any remedy out there. [Insert name of deity here] bless the engineers of the world.
- The nice folk over at the W3.org have defined the differences between “GET” & “POST” and when to use them: http://www.w3.org/2001/tag/doc/whenToUseGet.html.
- Many blessings upon Mr. Rigby: http://alistapart.com/articles/prettyaccessibleforms.
Exercise questions
Time to code your own contact form.
- Create a simple contact form that asks the user for their name, email address, and a comment.
- Add a checkbox asking if the reader would like to join your mailing list.
- Use some CSS to style your form: set a width to the form, align the labels to the left, put a background colour on to your page, etc.
Extra Credit: The more you play with the form elements and different CSS the more you will see what you can do with a simple contact form.
Extra Extra Credit: If you want to proceed into deep unknown lands, find a script or use one that your web host provides to send the form to yourself. If the script part to make the form gets a bit ornery, bribe a nice programming sort with neon snacks.
About the author

A web designer/developer by trade, a photographer, moblogger and professional art weirdo for the love of it, Ms. Jen started her art and design career in the high chair with her love of personal food art and food wall art at the age of 11 months. She taught herself HTML in 1996 when a computer snob said that an artist could not learn to code and has been fully in love with all things web design ever since.
Ms. Jen is the owner and founder of Black Phoebe Designs, a web & mobile design firm. Ms. Jen has has a Masters degree in Computer Science and Multimedia Systems from Trinity College in Dublin, Ireland, and taught web design at an LA area university from 2001–2005. She has participated in two Nokia mobile blogging projects, Wasabi Lifeblog (2004-2005) and the Nokia Urbanista Diaries (2008). Ms. Jen can always be found online at blackphoebe.com or blackphoebe.mobi.
/codeThis article is licensed under a Creative Commons Attribution, Non Commercial - Share Alike 2.5 license.
Comments
The forum archive of this article is still available on My Opera.
-

Thank you for making this article very clear. I have learn a lot of stuff so far. It is not easy to create forms for all platforms and specially for Opera. Your article gives good keys.. Thank again for sharing your knowledge.
No new comments accepted.operafan59
Sunday, February 3, 2013