This documentation relates to Opera's now deprecated .oex Extension API framework for Opera versions <= 12.15 and also provided by our OEX2NEX shim library.
For the latest Opera Extensions API documentation for Opera versions > 12.15 please consult the latest Opera Extensions API documentation online.
This article details how to use a new feature of Opera extensions called the options page. This is a page in the extension containing preferences the user can set, defined in an options.html file in the root of the extension directory.
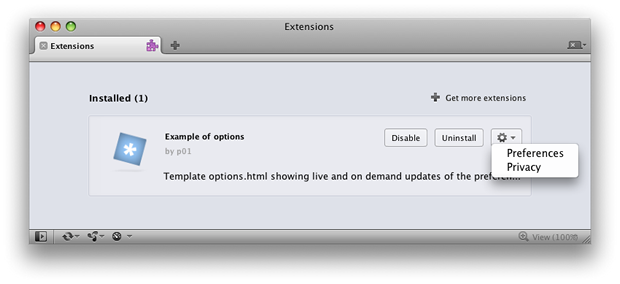
The way it works is quite simple—when you install an extension, if Opera finds an options.html file in the extension, it makes a "Preferences" option available for that extension in the Extension Manager (Tools > Extensions > Manage Extensions)—see Figure 1.
Figure 1: The new Opera extensions options page functionality, reachable through the Extension Manager.
Exactly what is put on the options page is entirely up to you as the extension author, but in general you should include form elements that allow the end user to choose different options and then save the changes to window.localStorage, or preferably widget.preferences, so they can then be easily applied to the extension.
In this article we will take you through the basics of creating your own options page, and then present a sample extension containing an options page template that you are free to use in your own extensions.
This section will walk you through the basics of creating an options page. Have a look at the code inside our sample options.html page as you go through this section.
options.html.Our sample options.html page looks like this:
<!DOCTYPE html>
<html>
 <head>
  <title>Hello world options page</title>

  <style>

  <!-- CSS omitted for brevity -->

  </style>
 </head>
 <body>

 <div id="wrapper">
 <h1>Sample options page for hello world example</h1>
 <form>

 <ul>
   <li><label for="colour">Select background colour:</label>
   <select name="colour" id="colour" />
     <option value="white">Default white</option>
     <option value="red">Red</option>
     <option value="yellow">Yellow</option>
     <option value="blue">Blue</option>
     <option value="green">Green</option>
   </select>
   </li>
   <li><label for="font">Select font:</label>
   <select name="font" id="font" />
     <option value="sans">Default sans</option>
     <option value="serif">Serif</option>
     <option value="mono">Monospace</option>
   </select>
   </li>
 </ul>

 </form>
 </div>
 </body>
</html>
Try the first version of the updated hello world example. Go to the Extension Manager and choose the "Preferences" option for this extension, accessed by clicking on the cogwheel button. You should then be sent to the options page, as seen in Figure 2.
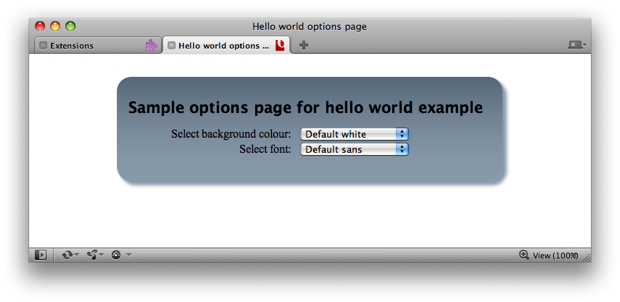
Figure 2: Our sample options page.
The trouble is ... it won't do anything right now! Now we need to add some JavaScript to communicate the changes back to the extension and put them in to effect. This is what the next section will deal with.
As a next step, we will add the following script into options.html to allows us to store the preferences for the background colour and font for our Hello world extension.
<script>
var bgColor = document.getElementById( 'colour' ),
    font = document.getElementById( 'font' );

bgColor.addEventListener( 'change', function() {
  widget.preferences.backgroundColor = this.value;
}, false );

font.addEventListener( 'change', function() {
  widget.preferences.font = this.value;
}, false );

if ( widget.preferences.backgroundColor && widget.preferences.font ) {
  bgColor.value = widget.preferences.backgroundColor;
  font.value = widget.preferences.font;
}
</script>
Lets go through this step by step:
<select> menu via their IDs and bind listeners for the change event.change event fires and we store the value of that preference in the widget.preferences storage object. We'll explain that in more detail later on.We also need to add some script inside popup.html, the file that causes the popup to appear when you click the hello world button. This script reads the values that are stored in widget.preferences by the script in options.html, and updates the styles inside the popup window.
<script>
window.addEventListener( 'DOMContentLoaded', function() {
  if (widget.preferences.backgroundColor && widget.preferences.font ) {
    document.body.style.backgroundColor = widget.preferences.backgroundColor;
    document.querySelector( 'h1' ).style.fontFamily = widget.preferences.font;
  }
}, false );
</script>
Quite simply, we check widget.preferences to see if the user has set any preferences, then assign those values to the relevant style objects. The changes are instant—you don't even need to submit the form or reload the extension to change the preferences! If no preferences have been set, the default CSS styles take effect.
Try the final version of the updated hello world example to see this code in action.
The widget.preferences interface is exactly the same as that of the window.localStorage object, except that it doesn't have the same size limitations as window.localStorage. In addition, widget.preferences default values can be declared in the <preference> elements of your config.xml file, as seen in The preference Element and its Attributes section of the Widget Packaging and Configuration specification. Therefore, when the script in our options.html template sets a preference on the widget.preferences object, a storage event is fired on the active documents of the extension (especially the background process). By listening to the storage events, the background process of your extension can react immediately to any change in widget.preferences.
For speed dial extensions, the options page is also accessible by right-clicking on the speed dial, and selecting "Preferences". This will, instead of opening a new tab, call out a special preferences pane showing the options page. You can see an example in Figure 3.
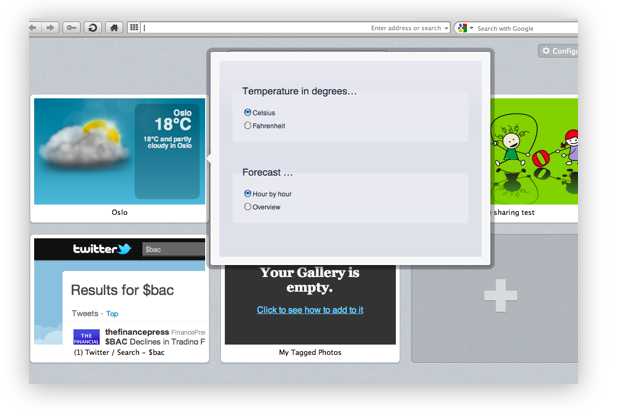
Figure 3: The seperate pane showing the options page for a speed dial extension.
Now we've looked at a simple example, it is time to look at our sample options page template. The template is contained inside a sample extension that doesn't really do anything, and simply serves to show off the extension options page functionality.
Install the extension, then select the "Preferences" option from the Extension Manager—you'll go to the extension's options page, which looks like Figure 4.
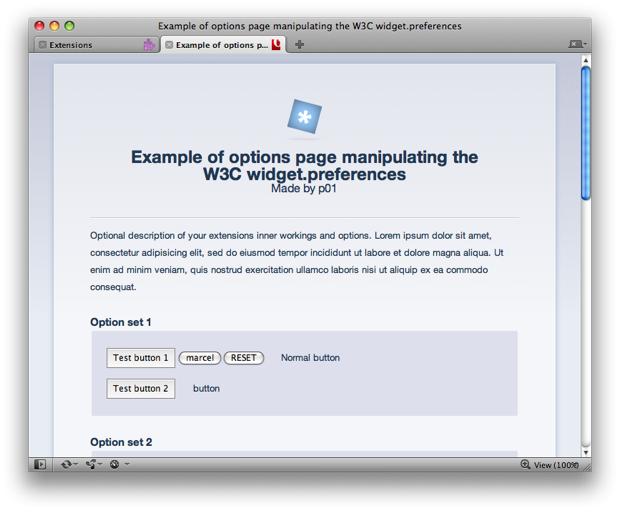
Figure 4: Our options page template.
When you open the options page for the extension, the script goes through any <select> and <input> elements with a name attribute and sets their value to that of the corresponding item in widget.preferences. You can therefore feel free to remove or add form elements from the markup of the options.html page, and it will continue to work just fine.
In addition, the script automatically populates the title of the page and the name and author of the extension. It picks these up from the widget object, window.widget, which gets them from the config.xml file.
By default, the preference values are hardcoded into the markup of the options.html file. When the user changes the value of any of the form elements, the preference values are stored immediately in the widget.preferences object.
When the options page is loaded and the document is ready, the script goes through the different form elements and populates them with the values from widget.preferences, if there is one, or falls back to the default hardcoded values.
To handle preferences with multiple values, e.g. checkbox groups and multiple selects, we join/split the multiple values using a variable called glue in the script of our options.html template: a simple \n. If your extension requires advanced preferences, we recommend writing your own options.html page to better cater for your specific use cases.
This concludes our tour of the Opera extensions options page functionality. Feel free to grab our template and use it in your own projects.