An introduction to Opera Unite
Introduction
The time has come to raise the curtain on yet another exciting new Opera technology release. The drums are playing a low roll, which increases in intensity as the onlookers stare in antici … pation; the lights begin to come up, along with the curtain; the stage is all set for passion and the energy of today’s performance; the narrator spoils the mood by talking through it (that’s me…)
So what is Opera Unite? In a nutshell, Opera Unite is a collaborative technology that uses a compact server inside the Opera desktop browser to share data and services. You can write applications — in the form of Opera Unite Services — that use this server to serve content to other Web users.
Why is this exciting? Well, it allows you to interact with contacts, sharing data and services without the need for any third-party Web sites/applications to be involved at all. Think of the possibilities:
- You could play games and chat to your peers directly using the service
- You could share photos and videos with peers, straight off your hard drive, without needing to use third-party Web applications
- You can work collaboratively with others on files such as data and images (think wikis or drawing applications), and then work with those files offline if you wish, before sharing them again at a later date
- You could even start creating some crazy hacks, like an application that controls a remote car across the Web (I’ve seen a rough prototype in action)
Itching to know more? Good. In this article I first present a tour of Opera Unite, with details of how to activate it, how to install a Opera Unite service, and how to use those services to collaborate with your friends and colleagues. If you want to find out more about developing your own Opera Unite Services, read our Opera Unite developer's primer.
Getting Opera Unite up and running
So, it’s time for you to get your hands dirty, and starting playing with some Opera Unite Services.
Installation
The first thing you need to do, if you haven’t already, is download the latest version of the Opera for desktop. This is our regular browser so what’s different? Well, nothing immediately jumps out, but rest assured that you’ve got a lot of new power under the hood with Opera Unite Services.
As we mentioned before, with Opera Unite you can run Opera Unite Services in the browser and collaborate with your friends. So let's try this out, by installing a service from the Opera Unite home page — navigate to this page now, and click on one of the services at the bottom of the page to display more information about that service (see Figure 1). Click on the Launch Service button and it will either start to download — in which case you’ll see a progress box, or it will inform you that the service is already installed and give you instructions to access it from your browser, or reinstall it if you so wish.
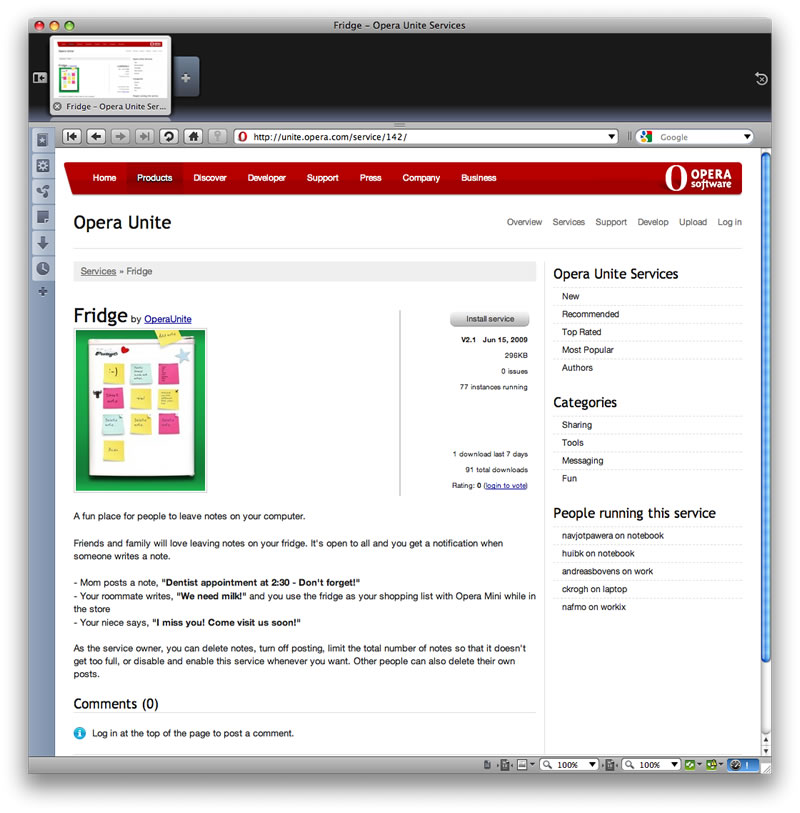
Figure 1: An Opera Unite service on the Opera Unite home page

Figure 2: The Opera Unite icon in the browser UI
Once the install has finished, you should be asked if you want to start Opera Unite. If not, you can start Opera Unite by selecting Tools > Opera Unite Server > Enable Opera Unite, or clicking the Opera Unite button in the bottom left corner of the browser (see Figure 2) and selecting Enable Opera Unite.
Logging in to Opera Unite
Regardless of which of the three different ways mentioned above that you used to enable Opera Unite, you should now be looking at the first step of a wizard asking you to Log in into your Opera account, as seen in Figure 3.
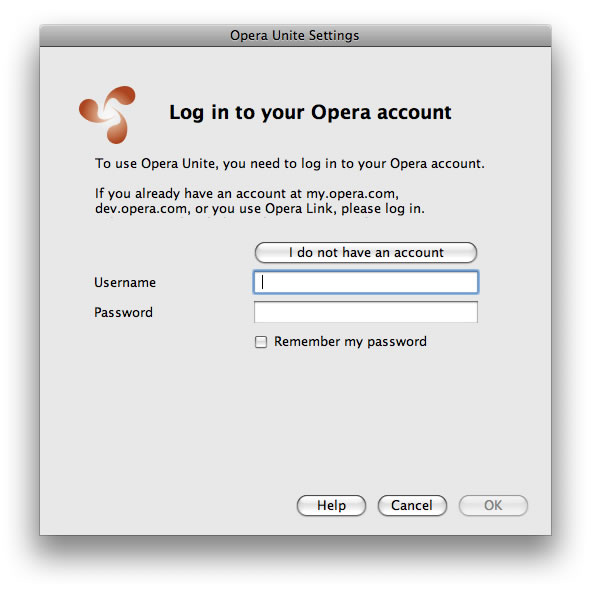
Figure 3: The Opera Unite log in screen
To use Opera Unite Services, you need to log into Opera. This is the same login that you use to log in to My Opera, Dev Opera, or Opera Link.
Go ahead and fill in your details now. If you haven’t got an Opera log-in already, you can create one by clicking the “I don’t have an account yet” button, and filling in a slightly longer — but still self-explanatory — form. Click OK to continue, and you should now be logged in to Opera Unite! You'll know you are logged in sucessfully when the icon shown in Figure 2 lights up.
Choosing an Opera Unite name for your computer
The next thing you should do is click on the Figure 2 icon and select the Configure... option. You’ll now be prompted to choose a name for your computer from a drop-down list, as shown in Figure 4 (you can also choose to disable Opera Unite from this screen; don't worry about the other option for now).
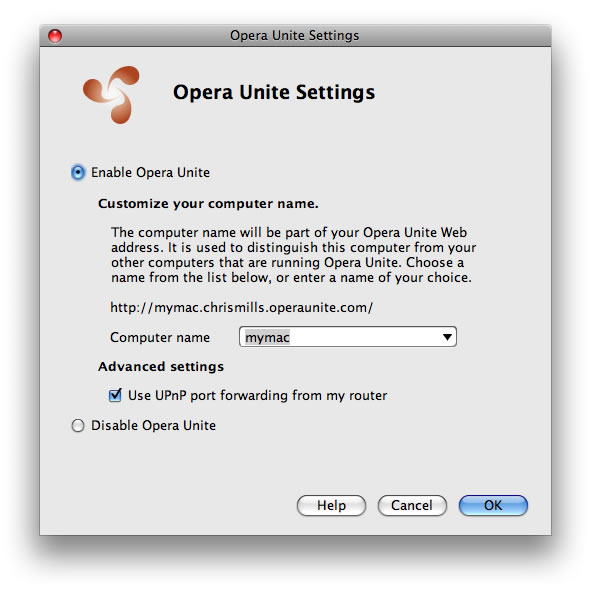
Figure 4: Choosing an Opera Unite identification name for your computer
This name is basically your computer’s identity on the Opera Unite system — this is the URL that your contacts can go to if they want to make use of your Opera Unite Services, and share them with you.
The URL system used to involve a special protocol of unite:// for the service owners, but this has since been changed to use simple http://admin.. So the URL pattern is still http://mymac.chrismills.operaunite.com/opera_messenger/, for example, for a service viewed by one of your contacts, or http://admin.mymac.chrismills.operaunite.com/opera_messenger/ if you are viewing the service as an administrator, which will give you the service admin page.
Click Finish.
Finding your way around Opera Unite
The first place to go is the screen shown in Figure 5 — this is your Opera Unite homepage, and you can get to it by:
- Clicking the Opera Unite icon in the bottom left hand corner of your browser (remember Figure 2) and selecting My Opera Unite Page
- Selecting Tools > Opera Unite Server > My Opera Unite Page
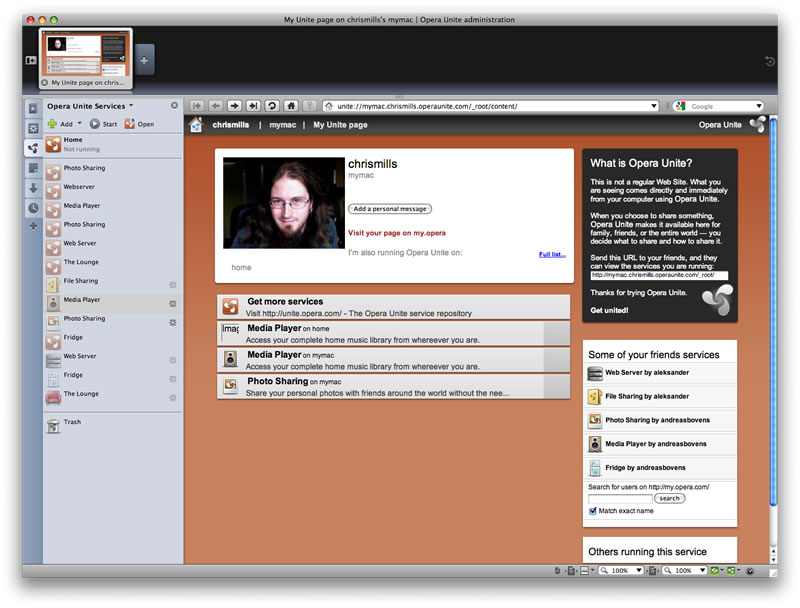
Figure 5: Opera Unite now enabled and ready to use
Note that there are a few preinstalled services in the alpha build. We may or may not include preinstalled services in the final version but would like to hear your feedback on this point.
Your home page contains:
- The URL that your friends can navigate to, to get to your services; as mentioned before, in my case it is http://mymac.chrismills.operaunite.com/). This is in the top-right of the screen
- A link to the Opera Unite homepage, where you can download more services and find more information — Get more services
- A list of the services you have running
- A list of the services some of your friends are running
The next thing to know about is the Opera Unite Services panel — this appears on the left of your screen when you select the Manage Services option from the Opera Unite menu (see Figure 6). You can also get to it by clicking the Opera Unite icon in the icon tray on the very left of the browser window, or by selecting Tools > Opera Unite Server > Manage Services.
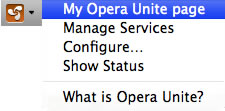
Figure 6: The bottom left-hand corner Opera Unite icon, when enabled
The Opera Unite Services panel looks like Figure 7. This panel has a link to your Opera Unite home page, plus an icon for each service you have installed. It also has a trash can icon for you to get rid of services you don’t want to run anymore — to get rid of a service, just drag its icon to the Trash.
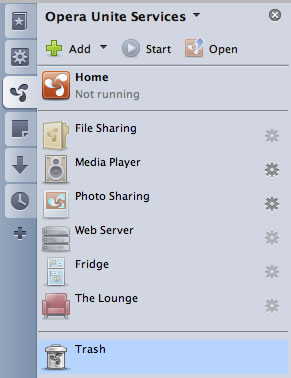
Figure 7: The Opera Unite Services panel
Let’s collaborate! using Opera Unite Services
Now we’ve finished our Opera Unite tour, let’s start doing something interesting! To appreciate the power of Opera Unite Services, you need a friend, or friends, who are online and willing to collaborate with you. If you don’t have a friend, then you’ll have to settle for another computer in your house or office, or even another Web browser on the same computer. You need Opera Unite to actually host and run services, but, to merely consume them, all you need is a Web browser pointed at the Opera Unite home page of the person running the services — http://mymac.chrismills.operaunite.com/. Try it in Firefox, Safari, or Opera Mobile!
Before we can share anything with our friends, we need to run some services. Let’s do that now.
Having a chat with your friends on Opera Unite
On your Unite-enabled browser, double-click the Opera Unite The Lounge service to start it running. You’ll be greeted by the Lounge screen, as shown in Figure 8
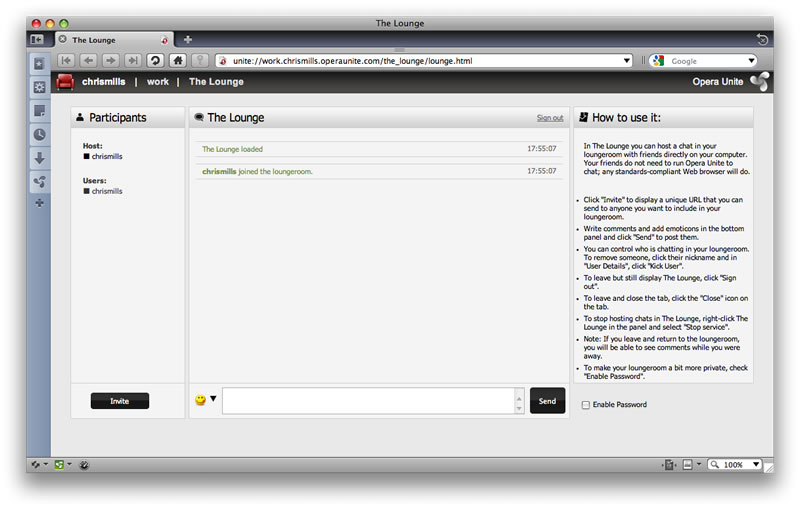
Figure 8: Logging in to the Opera Unite Lounge service
Now get your friend to navigate to your Opera Unite homepage and double click your Lounge service. They will first be prompted to choose a name to be known by inside the lounge, then you should be able to start chatting away to one another, as shown in Figure 9.
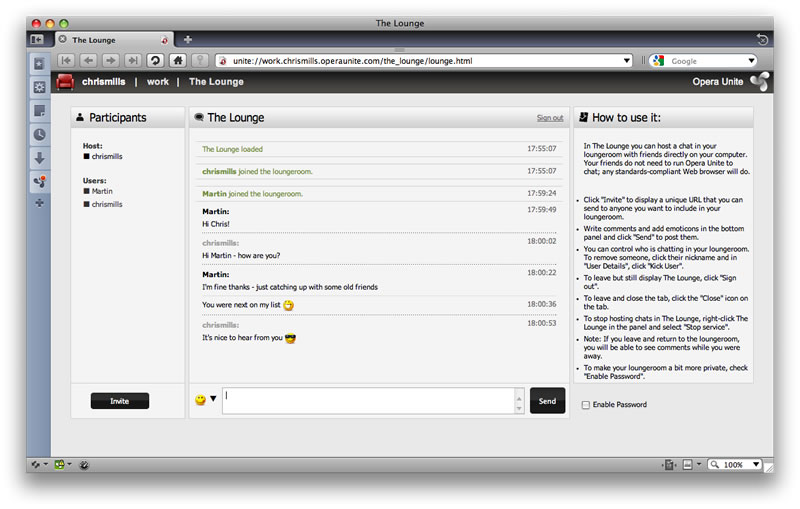
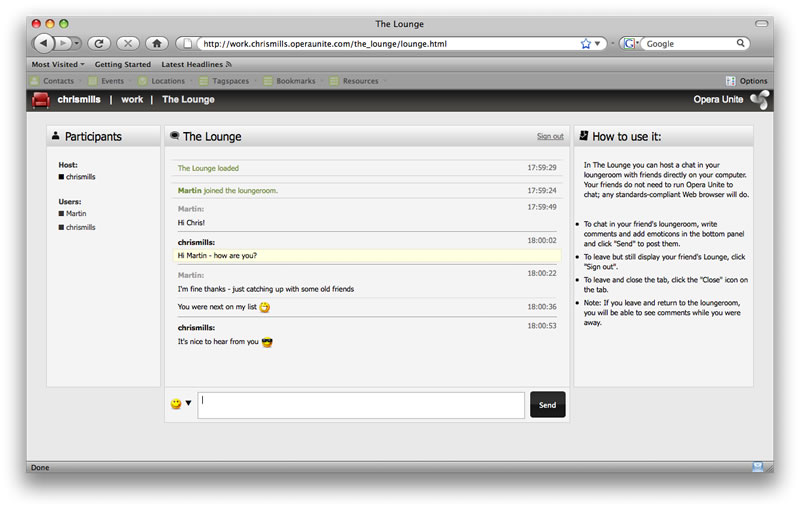
Figure 9: Two friends having a good conversation in the Opera Unite Lounge — one using Opera, and one using Firefox
If you have more friends with the Opera Unite build running, get them to join in your chat as well, in the same way!
Although this only scratches the surface of what is possible with Opera Unite, you must admit that it is nice to be able to have a chat with your friends online without needing to involve any third-party Web sites, or download any messenger applications.
Sharing some music with your friends
Now let’s have a look at sharing some media with your friends. In the same manner as seen above, double-click the Opera Unite Media Player service. You will be greeted by a dialog box as seen in Figure 10.
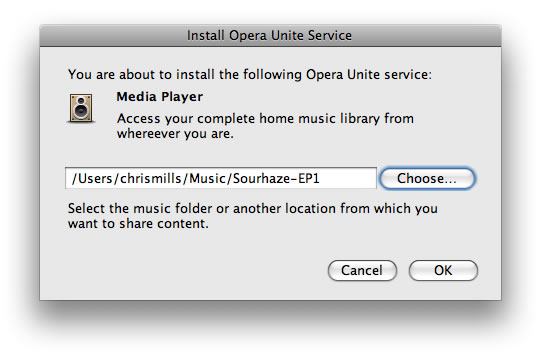
Figure 10: Choosing a folder from which to share files
Here you need to do one simple thing - select the folder on your hard drive that you will select media from. Select a folder full of MP3s on your HDD (or create one and select it if you don't already have something handy lying around) and click OK.
This is something important to note in Opera Unite — some services require you to specify a folder to share files from, and some don’t. It makes sense to create a special folder for each Opera Unite service you are using to share files, so you can easily control what you are sharing, and don’t give access to anything you’d rather not share.
When you click OK, you should be greeted by a screen like the one in Figure 11.
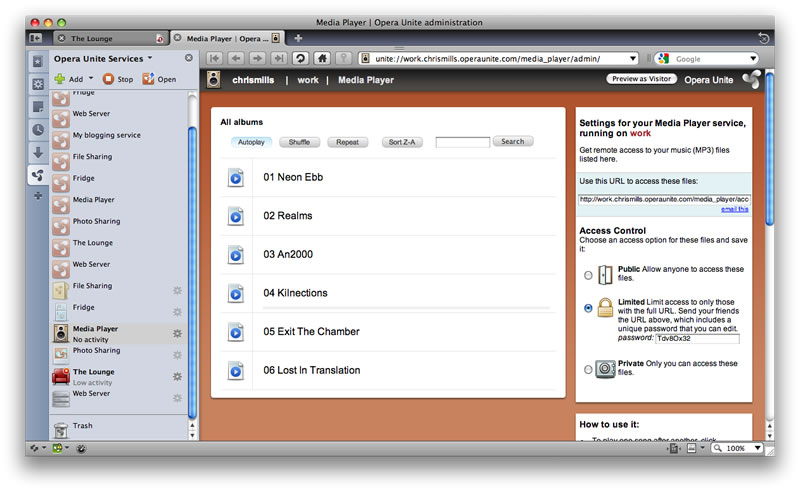
Figure 11: The Media Player service-settings screen
This has four interesting features:
- It lists the files inside the folder you selected in the above step. You can click the play buttons to play the songs, or use the other controls to Autoplay, Shuffle, order, and search through the songs as you like. This is the main panel on the top left
- It gives you the URL you need to share with your friend(s) to allow them to access your music ’ this is at the top right
- It allows you to set 3 different security levels for your music:
- Public: Everyone can access it freely without a password
- Limited: Your friends and colleagues can access it, as long as you give them the correct URL containing the password.
- Private: Only you can access it.
- It also lists other people running this service, and some of the other services your friends are running at that time
Now send your friend(s) the URL listed in the top right of your Media Player screen (see Figure 11); if they access your service using this URL, it will bring up the screen shown in Figure 12.
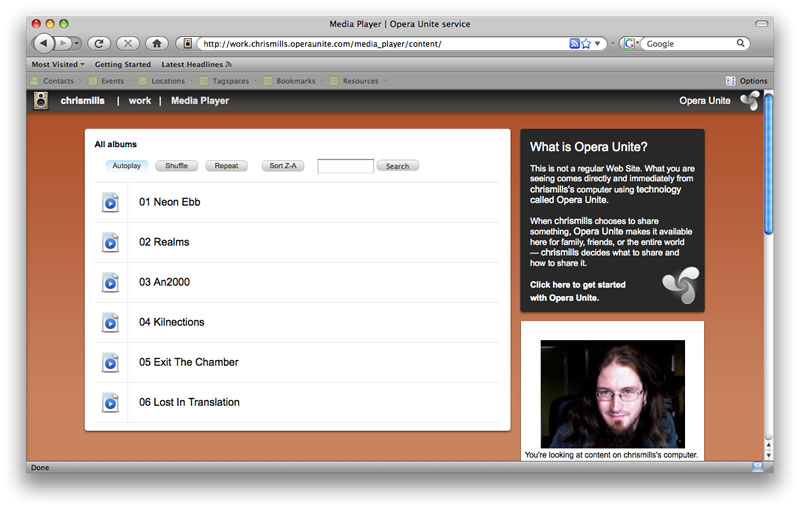
Figure 12: Your Friend can use the Media Player to play your media live on their machine
They can now double-click on the track names to hear them, straight from your hard drive. If they tried to access the Limited access service without being given the special password URL, for example http://work.chrismills.operaunite.com/media_player/, they would be directed to you to request access to your service, as shown in Figure 13.
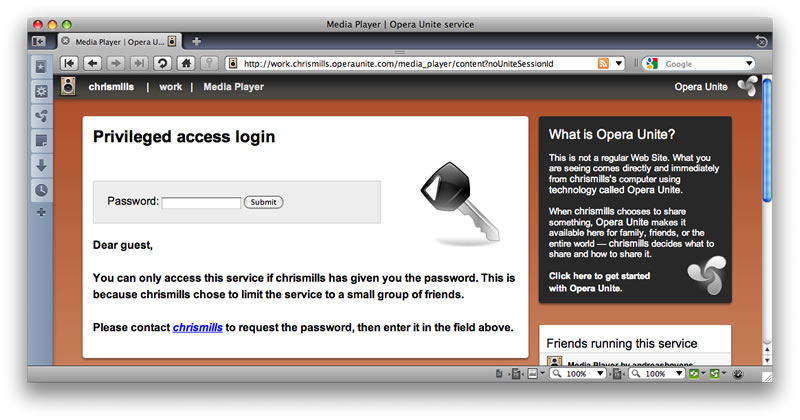
Figure 13: If you try to access a limited access service without having the password URL, you are directed to contact the service owner about it.
Summary
So that’s a wrap. I’ve introduced you to Opera Unite, given you a tour of the new property, and shown you how it works. If you are a developer wanting to write Opera Unite widgets, the best place to start is our Opera Unite developer’s primer.
You might also want to read the latest labs.opera.com post on Unite, to get more of an idea of the thinking behind it.
Now it’s up to you — we invite you to start playing with the available Opera Unite Services and let us know what you think.
Chris Mills

Chris Mills is a web technologist, open standards evangelist and education agitator, currently working at Opera Software in the developer relations team. He spends most of his time writing articles about web standards for dev.opera.com and other publications (such as .net mag and A List Apart), giving talks at universities and industry conferences, and lobbying universities to improve their web education courses. He believes that education is the answer to everything, but in particular he is passionate about using education to improve the overall content quality, accessibility, usability and future-viability of the Web.
He is the creator of the Opera Web standards curriculum, contributor to the WaSP InterACT project, and coauthor of InterACT with web standards: A Holistic Approach to Web Design. In August 2011, he also accepted the position of co-chair of the newly-formed Web Education Community Group.
Outside work he is a heavy metal drummer, proud father of three and lover of good beer.
This article is licensed under a Creative Commons Attribution, Non Commercial - Share Alike 2.5 license.
Comments
The forum archive of this article is still available on My Opera.
No new comments accepted.